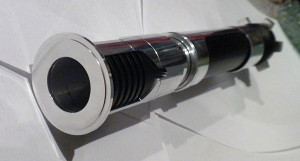
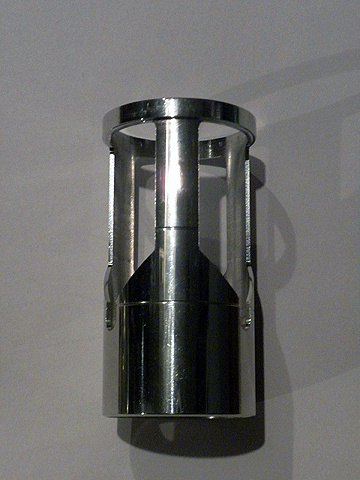
Custom/MHS OBI-TPM (hybrid)
ok..so this has been on the burner.. for....well for a long time actually.. I sorted started it when I saw Obi-Dar posted his build start...
it was shelved.. as I didnt care for the route I was taking at that moment....
anyways did some more work on it.. and here is where I am at.. figured Id get some feedback..
I think it looks a bit 'weird' to me because there are no cut-outs in the shroud/emitter yet..(Im hoping thats all it is!..lol)
as far as being an 'exact dup' in dimensions.. its of course not.. (its no ACE OBI TPM to be sure, spot on with awesome machining) ![]() .. 'but'..its not that far off from the dimensions I got on-line.... the most notable place is the main hilt 'OD'.. which will mostly be cut away so I dont think it will have that much effect on the final look... every thing else is exact or a not 'too bad'...
.. 'but'..its not that far off from the dimensions I got on-line.... the most notable place is the main hilt 'OD'.. which will mostly be cut away so I dont think it will have that much effect on the final look... every thing else is exact or a not 'too bad'...
overall length is over 11".. but little under 11.5 if I recall..
feedback is appreciated of course. ![]() things/areas to work on.. (although its not complete of course).. or things that should be re-done perhaps?
things/areas to work on.. (although its not complete of course).. or things that should be re-done perhaps?
Thanks.
(Im no photographer!)
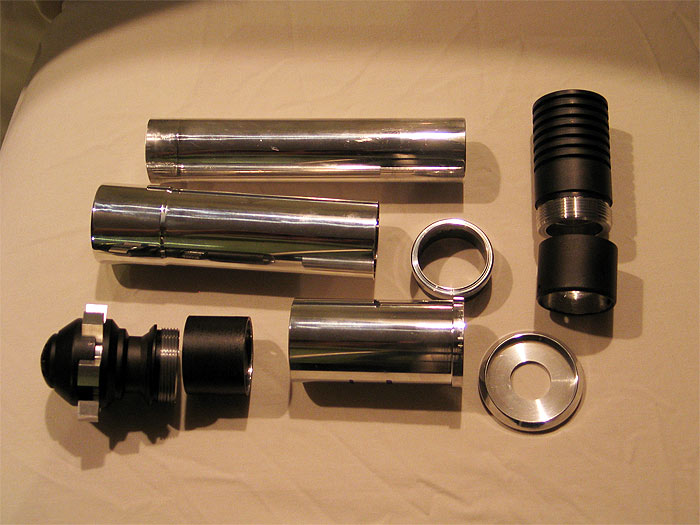
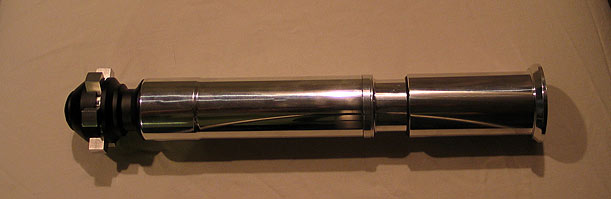
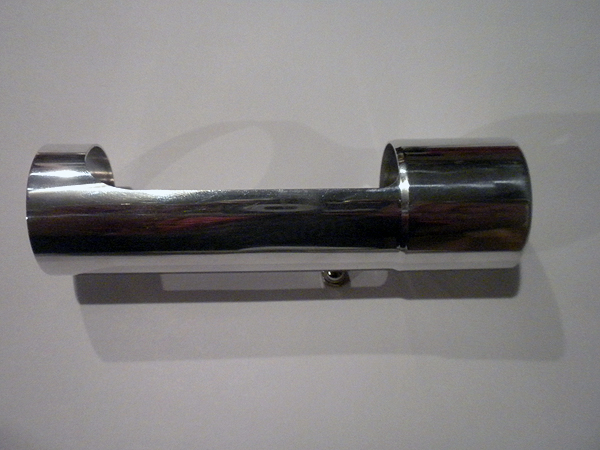
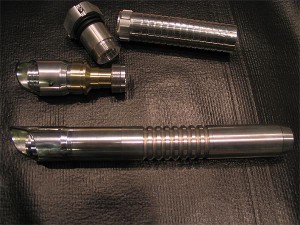
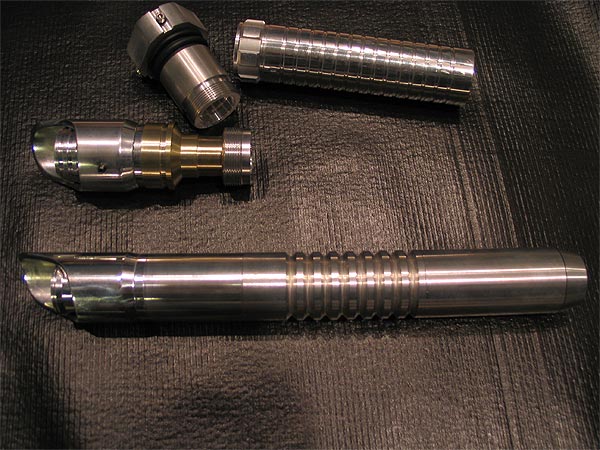
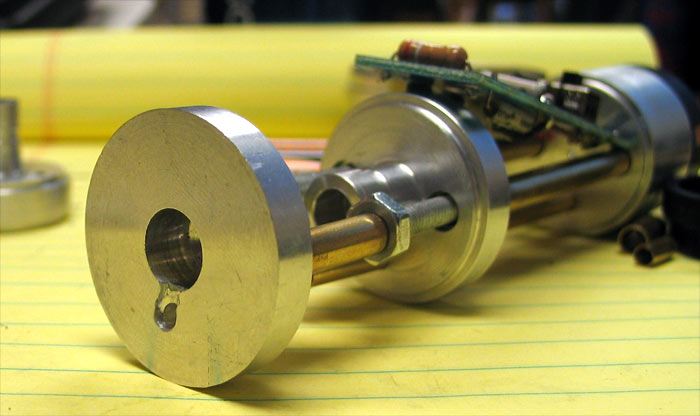
The parts used:
1 x Ace Obi TPM pommel
2 x 1.5 sink tube adapters (turned down to be 1.39 OD and faced to be roughly over 1")
1 x 1.25 'core' aluminum tube so it has a 1.25 choke section ![]() (slightly modified to meet ID of one of the adapters I used)
(slightly modified to meet ID of one of the adapters I used)
1 x MHS BH #3 turned down to be 1.39 OD)
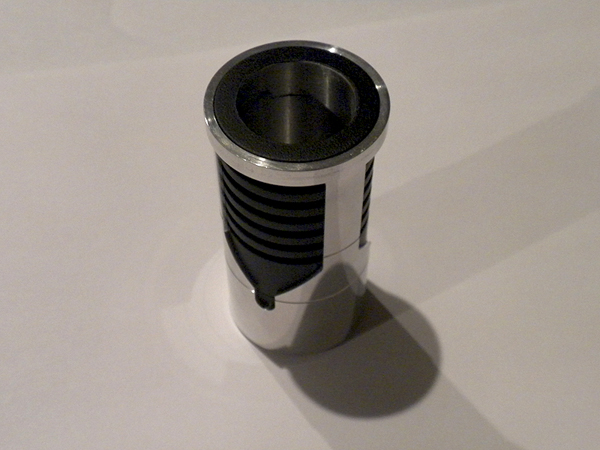
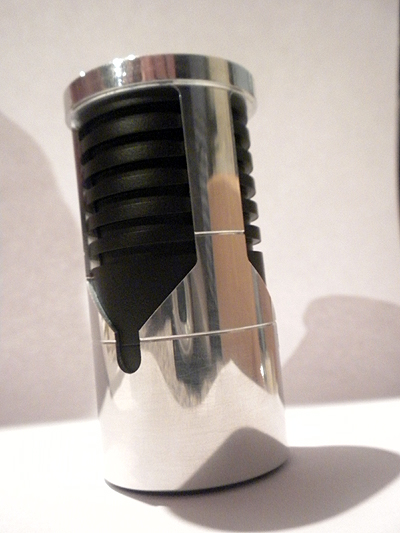
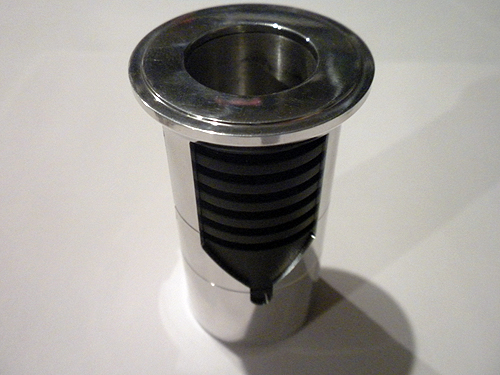
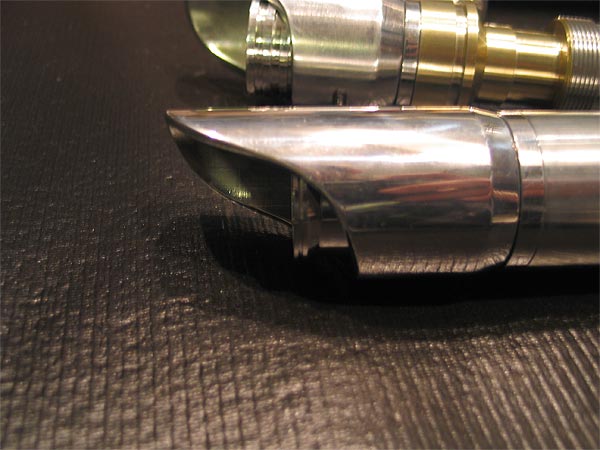
1 x custom hilt shroud ID bored to 1.39...OD to match the TPM as best I could..
1 x custom shroud ring/support for the top end which has a bit larger OD and design
1 x custom emitter shroud ID bored to 1.39 (OD has a bit of a lip/larger OD than the rest for the 'top ring")
1 x custom 'ring' taking a cue from Randy/Obi-Dar's build of course.. (and because I fubar'd my 1 piece attempt the first go-around) (DOH!) :dft001:
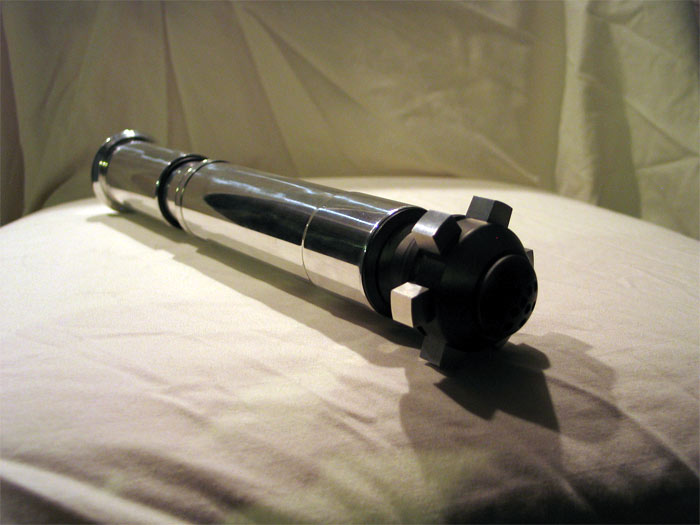
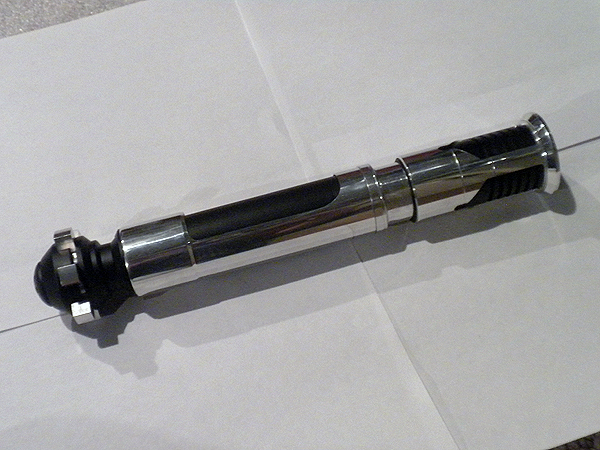
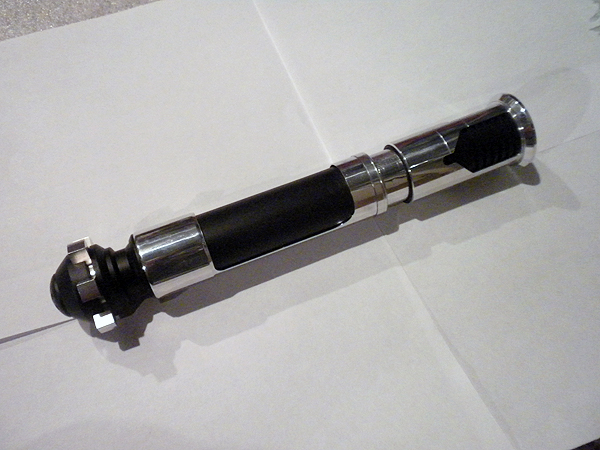
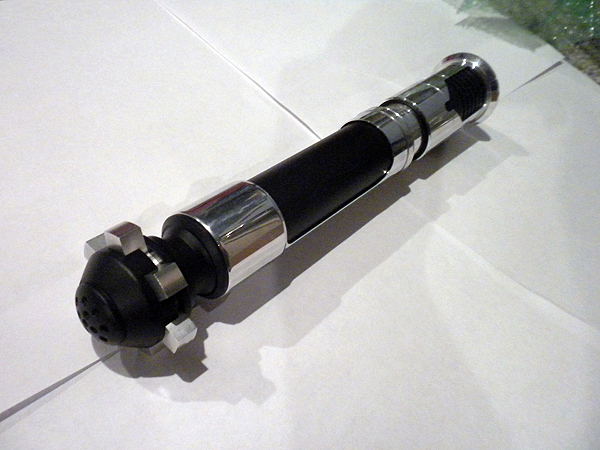
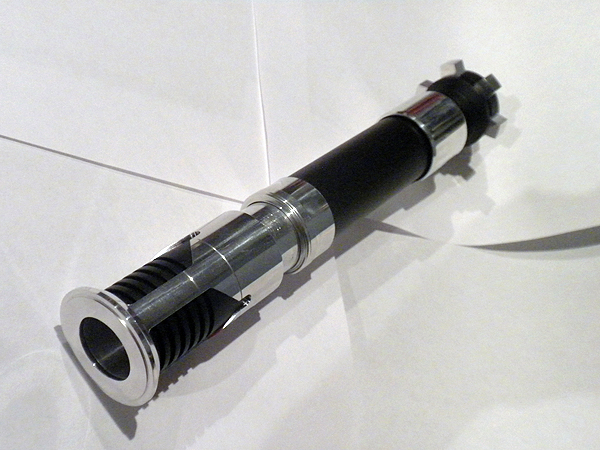
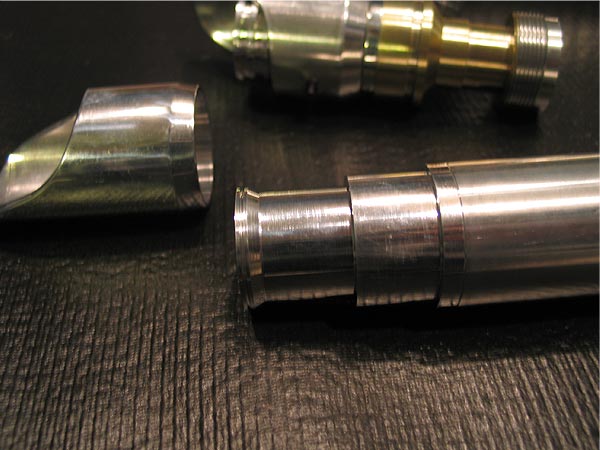
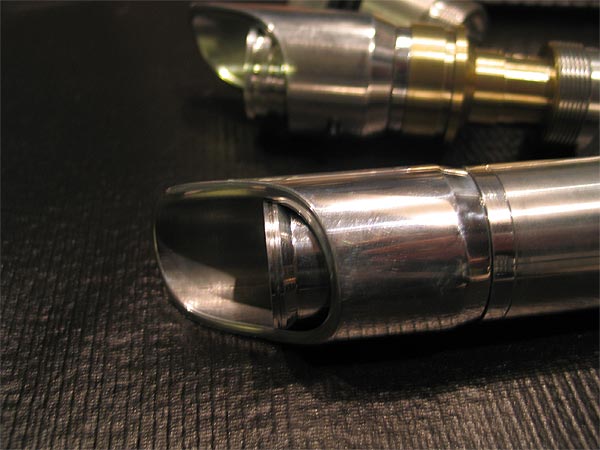
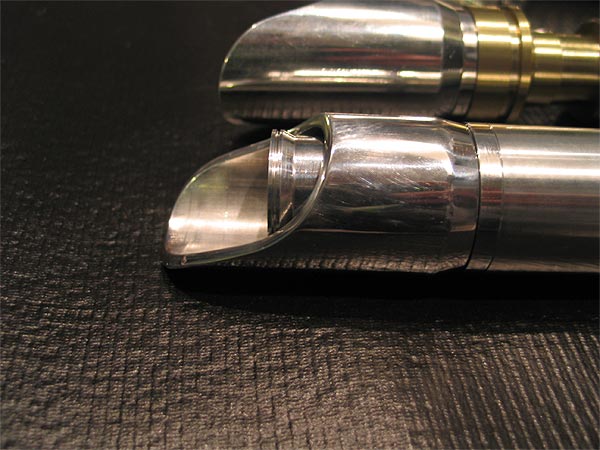
All parts
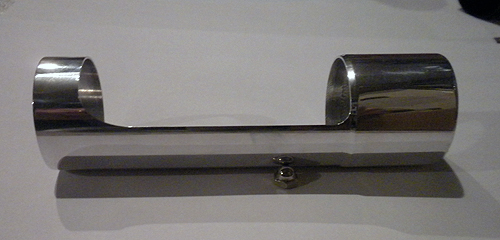
Rings attached:
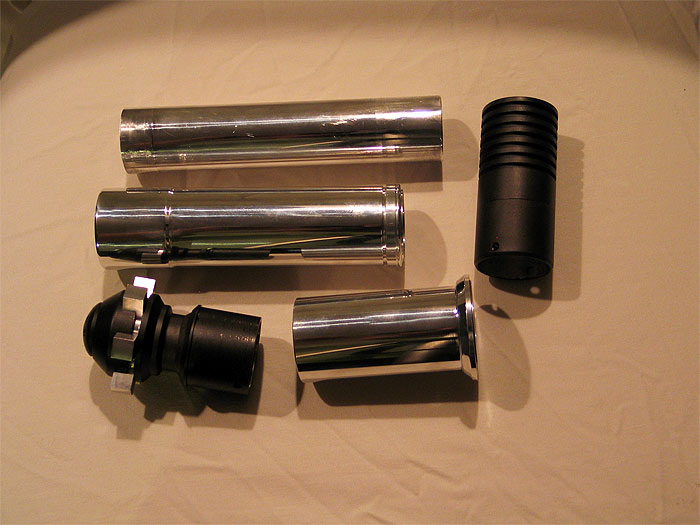
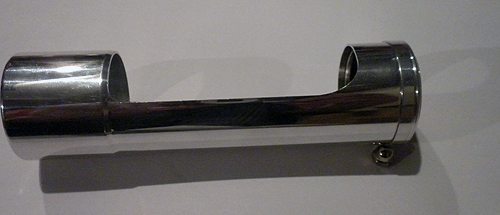
Top section:
Side:
Angle:
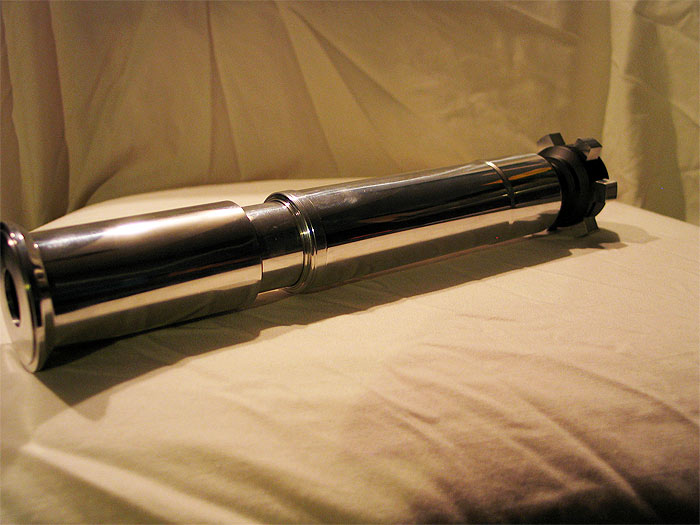
Full:
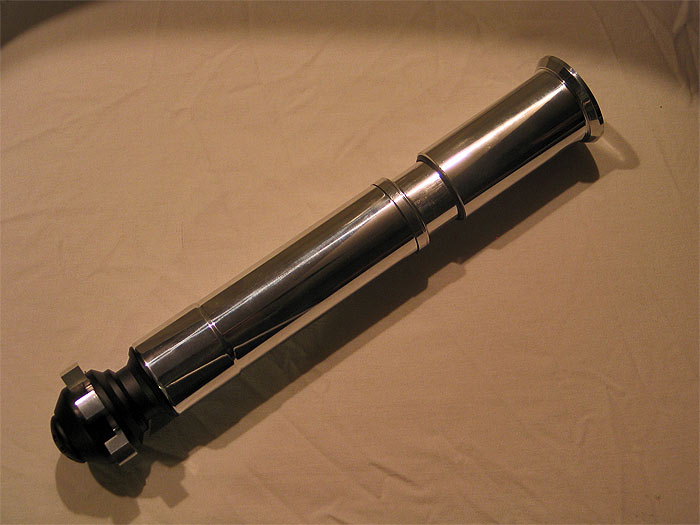
Last:
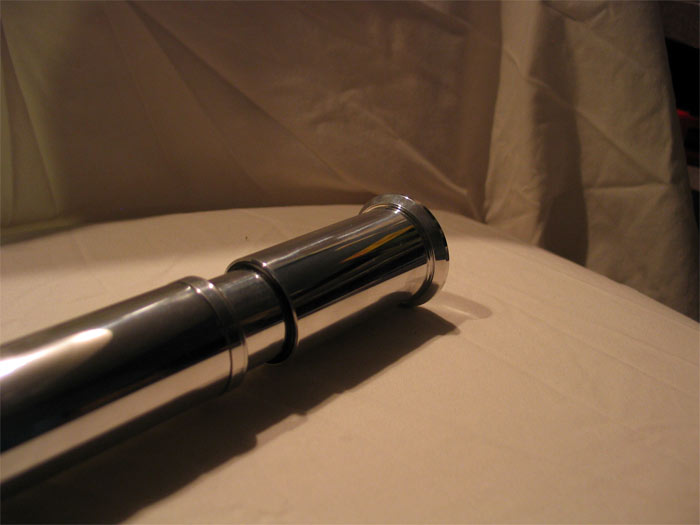
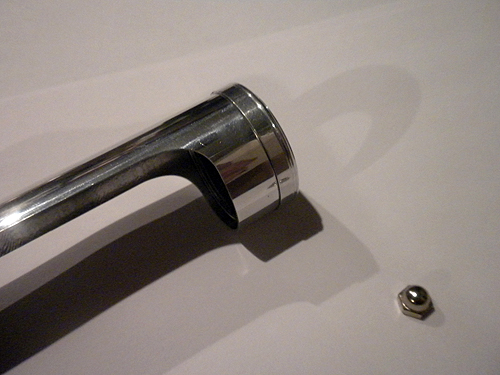
The OD of the ring needs to be opened up to 1" to accept a blade still.. but thats really only about 10 minutes of work to do..
if it passes the test(s).. then I'll work on the shrouds or something.. wire it up.. and see what board it gets (if any)..
if it goes over well.. I always have the 'rule of two' for builds.. and there is parts to make another ![]()
Thanks gang.
-------------------------[update II]------------------------------------
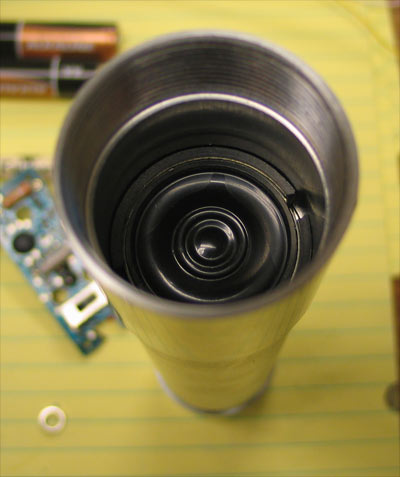
just some quick update shots:
got the 3 windows in the top emitter shroud and the window in the grip shroud cut out by Tim (great work too, thanks Tim)
bike value
some bezels
and the delrin 'grip section' and I can focus on internals..
not sure if it will be than board/battery pack etc...
not too much room for a chassis!
some pics.
(I think she is turning out very nice.. no "Erik/Ace" version!..lol.. but nice to me!) and not too fat/chubby.
the shroud and BH fit like a glove.... and Tim's window cutout make it look so nice.
I put the lines/grooves in just about the perfect spot with the BH and the modified adapter 'seam' makes it less noticeable
Heres a pic with the ring on and all together.. (pic isnt so great..its look nice in person.)
more pics of the sleeve I turned down..with slight dip/bevel that i sent to Tim to be cut out.
A pic with the sleeve and the 'collar/ring' for the 1.25 inner and sleeve connector/support. (this part is being re-done for better tolerance fit....that god its not a hard part at all!..)
Some side/full length views:
no delrin inner grip section.. just a 'temp' all black filler...lol

hopefully I'll get some free time to wrap up the hilt stuff.
Thanks
Custom MHS BH #2:
my second attempt for a shroud was to make one NOT so bulbous/wide.... (but after having that fatter one..and seeing the newer 'skinnier' one that isnt NOT much wider than stock MHS width... I doubt I'll do anything else BUT the fatter ones now..they just look and feel so much 'nicer'.)
figured Id post some pics of this second see what you guys think..
these BOTH utilized OLD BH's I had on my bench that had been used for mock ups..sizing..etc..and had been pretty beat up..and useless.. until they were used in this shroud/revamp project..
the other one used a BH#3.. this one uses a BH#1 that was modified a bit like a graflex holder..(in my mind) lol
feedback appreciated.. love it...hate it... (pack it up and go home douche` bag!.. whatever ya got!) =)
pic of base BH now:
with shroud (front)
side:
side 2:
compare shit to it on a random hilt ..and next to the other one for size check:

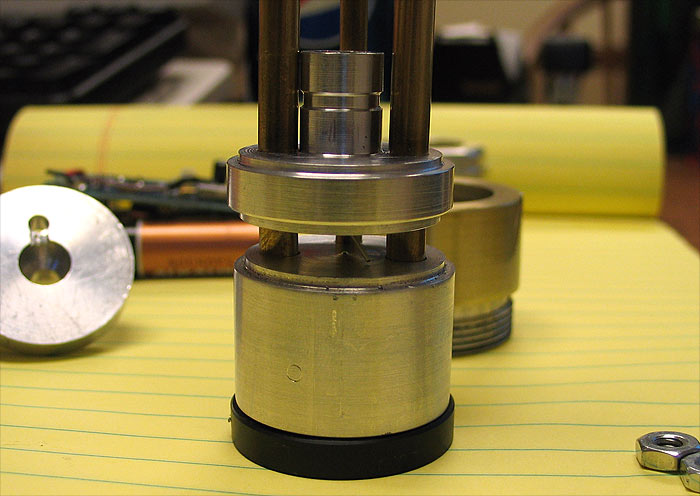
Prototype chassis: #1

So the wife and kids were gone for a few hours today! WOOT!..and I had some time to get in the garage..
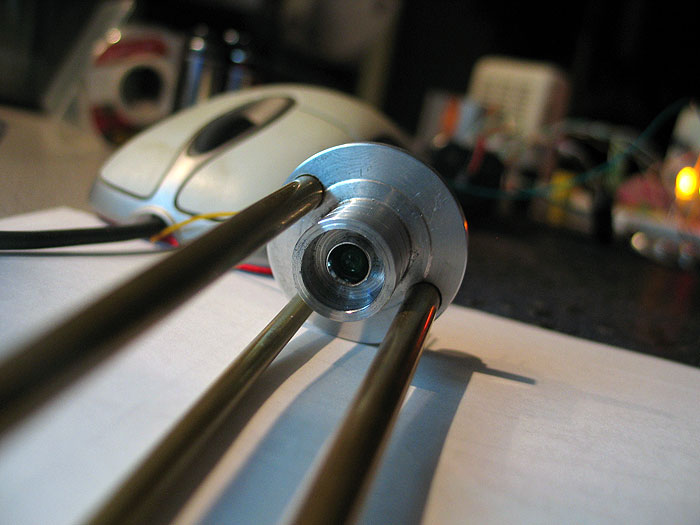
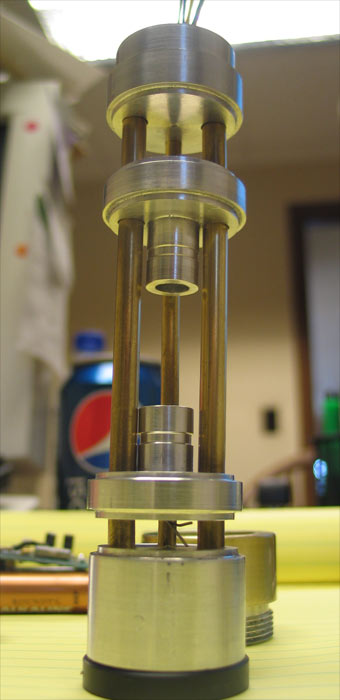
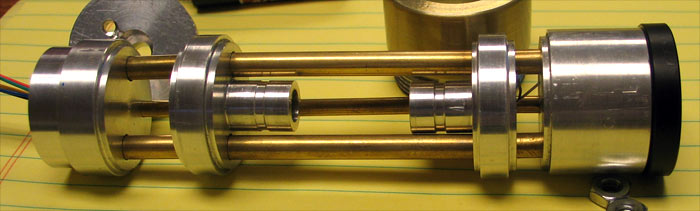
I worked on a prototype of a crystal chamber Ive had in mind.. not too much different that all the other versions I have seen..
I basically got the idea from using to inverted heatsink type pieces and others may have done..
the smaller end is bored out to hold the actual crystal.. but I have also drilled and counter sunk the inside to hole a LED w/holder..
same can be done with the top end (to hold an led) to do two different colors..same color..or left empty..
all holes to hold the brass rod is counter sunk so they hold..with threaded rod internally..
the 3rd smaller rod is counter sunk as well....and has no threaded rod.. it will be sandwhiched between the two 'plates'/holders...and be empty so you can run wire through it (like in the pic).
I have been working on several different versions of the 'holders'... which you could mix-n-match I suppose
1.) is a 1.25 OD...so it can fit inside the normal MHS parts.. (its not pictured in the images however)
2.) the one that is pictured..used the same type of approach the heat sink does..smaller that the internal threads ID..but bigger then the inside of the MHS ID.. so it gets caught on the 'lip'...and can be wedged down by screwing a male part.. keeping it tight..
3.) same as #2 but its THICKER..so it can be used in the pommel areas...
(I have been trying to think or or work out a way to secure a speaker to the end nicely..I was thinking just a little extended part to secure things too..and use the hollow rod to run wires through... the flip side of this is..trying to get a version that gives a knock-off LDM crystal pommel... and NOT block the speaker/sound... but that will need some redesign.
what ya guys think?
side/profile pic.. image same thing on top (not pictured)..but with either a disk OD that is 1.25 or 1.31 using to 1.31 sized OD disks..means you could make one that fits nicely and secure in one of the crystal chamber MHS parts.. or just fit inside the ID of an MHS part
bottom: (there is an led and I bored out big enough so you can use tweezers or clips to secure the nut on the led holder)
top/led shot:
no SaberForge jokes.. the grease/grit is still there... LOL it can all be wiped off...and polished up.. none its chatter or scratches....LOL
I didnt have alot of spare brass rod and threaded rod.. od I would have made some more mocks of it with a sound board...batteries.. but you get the idea..use your imagination. ![]()
This might be a god idea for "Tim" to looking into...
with professional craftsmanship... these would be NICE!.. all holes counter sunk to correct depth.... all rods cut to perfect exact length.. (not on a bandsaw by hand and eyed up!) LOL
-------------------------------------------------------------------------------
I was thinking it can be expanded to be something like this.. want more room..add another disk..and any size/length brass/threaed rod..
problems/changes
1.) rods need to be a little closer to the 'center' so if you use nuts to lock in a 'middle' disk (so to speak).. it has room..I think my clearance now is slim to none..LOL
2.) using acorn nuts at the bottoms is a wash..if you plan on locking down/sandwiching the disk with a male part.. however we might be able to just partially 'thread' a hold so you can thread the threaded rod into it..no acorn/flat nut needed on the BASE (of one end at least).. if you wanted to lock 'two' bases by male threads..one might need to be left hand threaded?? if one internal and one a sandwiched one.. acron/flat washers could be used no problems..
thoughts?
-----------------------------------------------------------------------------
heres an update.. I had a few hours in the garage yesterday..and revised some rough cut pieces.... its pretty versatile.. (IMHO)
as stated above.. I planned to take use of the already built in 'locking/securing/sandwiching' systems that all MHS parts utilize.. an that it by default all threaded parts leave a gap.. and this is for the thickness of either a heatsink.. or a speaker holder (if its a pommel)..
so that is what I based how to secure this 'core/chamber..etc)
these are ALL PROTOTYPES.. ROUGHT CUTS.. no fine cuts.. no filing,sanding/polishing..etc.. and only 1 jig used.. that was eyed up.. ![]()
all disks/sections.. come in 2 thicknesses..
1.) regular heatsink thinkness
2.) speaker holder thickness
all disks/option are either:
1.) heatsink OD
2.) 1.25 ID (to inside of MHS parts)
3.) smallest size that fits in the RIBBED sections
What size disk you use depends on your set-up and where, how you want to mount/use it.
this set-up is using the SPEAKER holder as the MOUNTING area.. where as the pommel secures locks down the speaker holder..(and hence the 'core section' is secure to that with a center drilled/tapped middle (not pictured)
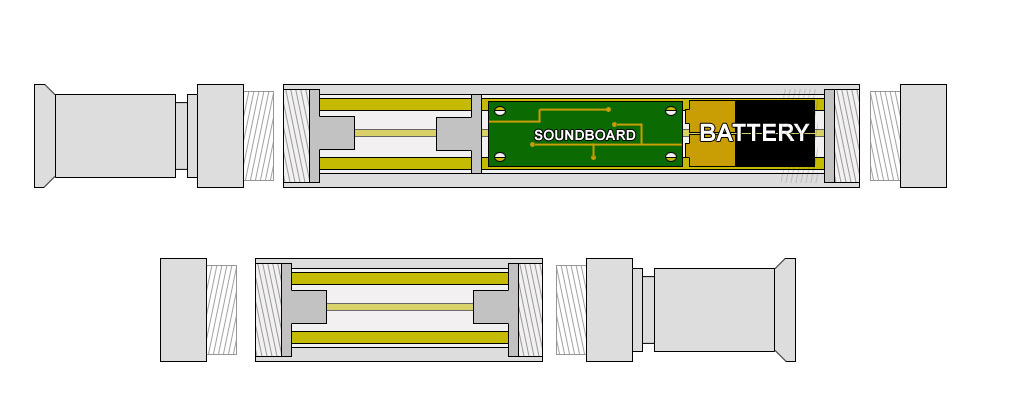
So its (going up)
speaker bucket / crystal chamber / extra space for sound board and/or battery pack..
same pic on its side:
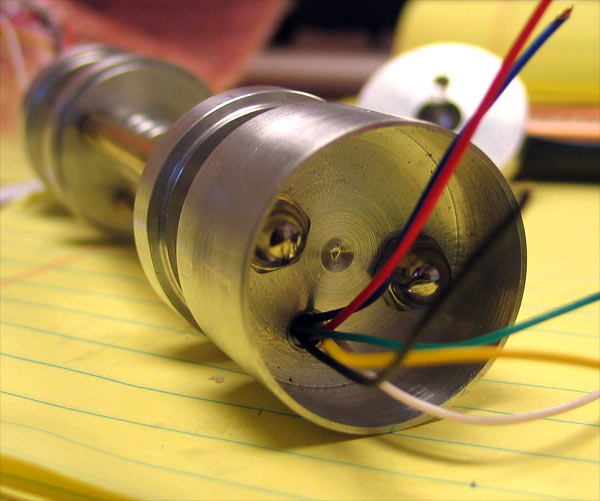
same as the ABOVE pictures in the previous post.. the 'stems' are drilled out and counter sunk to hold the LED and holders in place.. and secure with another counter sunk hole for the nut.
Also all brass rod holes are counter sunk.
[img width=589 height=768]http://dmstudios.net/misc/prototype-1a/core_prototype-1b/ledHolder.jpg">
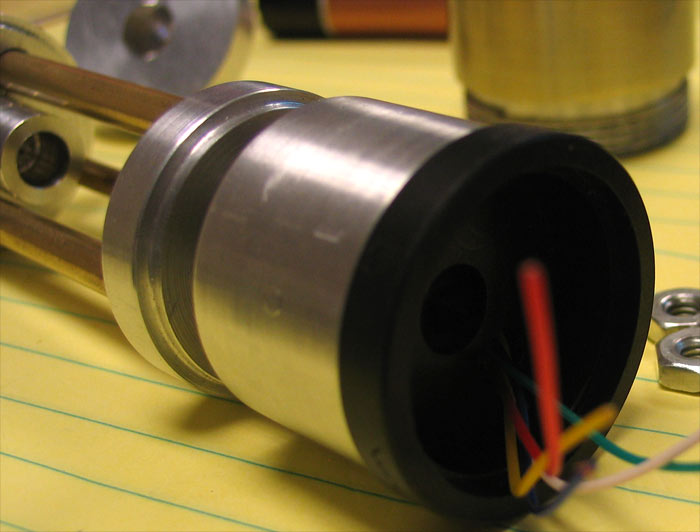
I made a little speaker bucket.. that holds a slightly turned down speaker holder.. (only the portion behind the lip was turned down)
(I put a little space between the speaker bucket and the bottom of the crystal stem..sing tiny brass rod sections.. gives a little gap to run a wire to the led in the bottom holder
it is deep enough to have room for the acorn nuts..and hide wires..or even snake more through for a bottom re-charge port..
speaker holder is stock OD at widest point..so I can slide it in a a threaded opening on most MHS parts.. and lock it down with either a pommel
I even made another speaker holder that has OD of 1.25 so the whole speaker/holder & bucket can sit flush inside (ID) of a regular MHS part..
if you go this route... you obviously will not be using the speaker holder/pommel to lock/secure the core...
so you would need to use a disk/section that can be locked down by a choke or blade holder..erc
I made some with and without the crystal stem/holder end..
so its really however you want to design it... crystal chamber & speaker.. or add another section to hold a sound board..or battery pack (just another disk and some brass rod w/threaded rod) cut to whatever length you need/want
you could use this secure/trap a crystal chamber in a ribbed section that has a section cut out..
just use a disk that can be secured by another male threaded part...and a disk that has the OD of the ribbed section ID..to keep things nice and tight..
as a final part to this.. Im working on a variation that uses (is) the heatsink for the LED..
this would make this all one unit/core/chamber piece... ![]()
here us JUST a speaker and chamber combo:
[img width=258 height=768]http://dmstudios.net/misc/prototype-1a/core_prototype-1b/speaker-chamber.jpg">
There is a 'falsey' brass tube that is hollow just to run wires cleanly..
another pic of the base that secures/locks down like heatsink

free floating speaker to give more res. chamber for sound..
all bases with stems can have an LED... 1 color, 2 colors, RGB LED in there..
all bases withOUT stems are half threaded holes.. no through holes..except for the falsey brass/wire hole..
thoughts/ discuss? love/hate? ideas? suggestions?
Thanks
----------------------------------------------------------------------------